How to Show Dates and Times to Respondents on Your Form
Turn on the Show dates/times on form setting so respondents see each dated option's date and time - on the form, in their confirmation email, in reminders, and on the thank-you page.
Show Event Dates and Times to Respondents
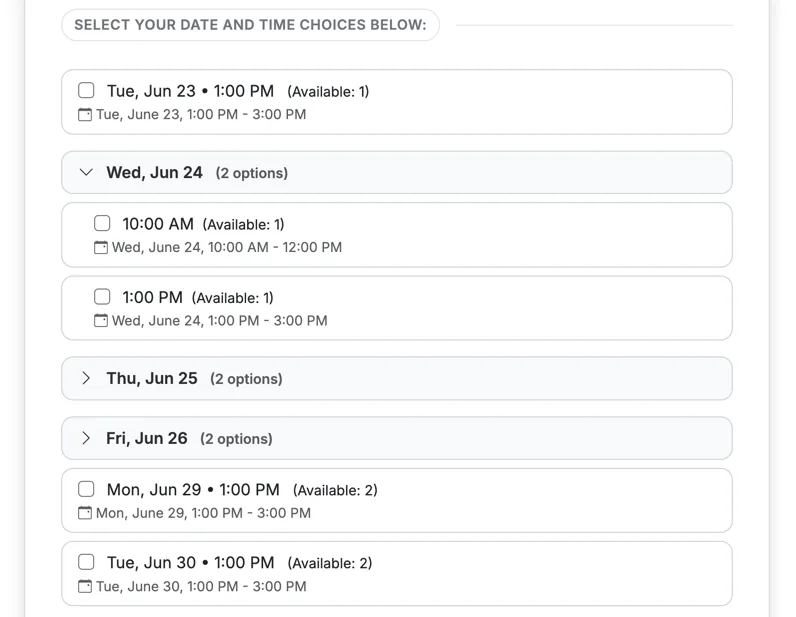
When your options have date/time attributes, you can choose whether respondents actually see those dates and times. Turning this on displays the date and time (and duration, if set) everywhere a respondent sees their selection: beneath each dated option on the form, in their confirmation email, in reminder emails, and on the thank-you page - so they always know exactly when each option is.
This setting requires date/time attributes on your options first. See Using Date & Time Settings to add them.
Step 1: Open your form's Edit page
Go to your Dashboard and click Edit on the form's card.
Step 2: Open Advanced Settings
Scroll to the Advanced Settings card and expand it. Under Time & Date, make sure Assign dates/times to options is on - the date settings only appear when it is.
Step 3: Enable Show dates/times on form
Check Show dates/times on form (labeled "Display dates to respondents and on confirmations"), then save your form.
What changes
With this on, each dated option's date and time is shown to respondents on the live form, in their confirmation email, in reminder emails, and on the thank-you page - always in the event's time zone (e.g. EST), with the respondent's own local time shown alongside on web pages when it differs. With it off, the dates are still saved and still power features like automatic reminders, calendar invites, and the show/hide-by-date filters - they just aren't shown to respondents.
Here's how options look to respondents with dates/times shown:
Related: Using Date & Time Settings