Option Descriptions
Learn how to add text descriptions to options to provide additional detail for respondents when they select an option.
Add text descriptions to options to provide additional detail for respondents. You can enable Option Descriptions in the Advanced Settings on the Edit page of your form.
Step 1
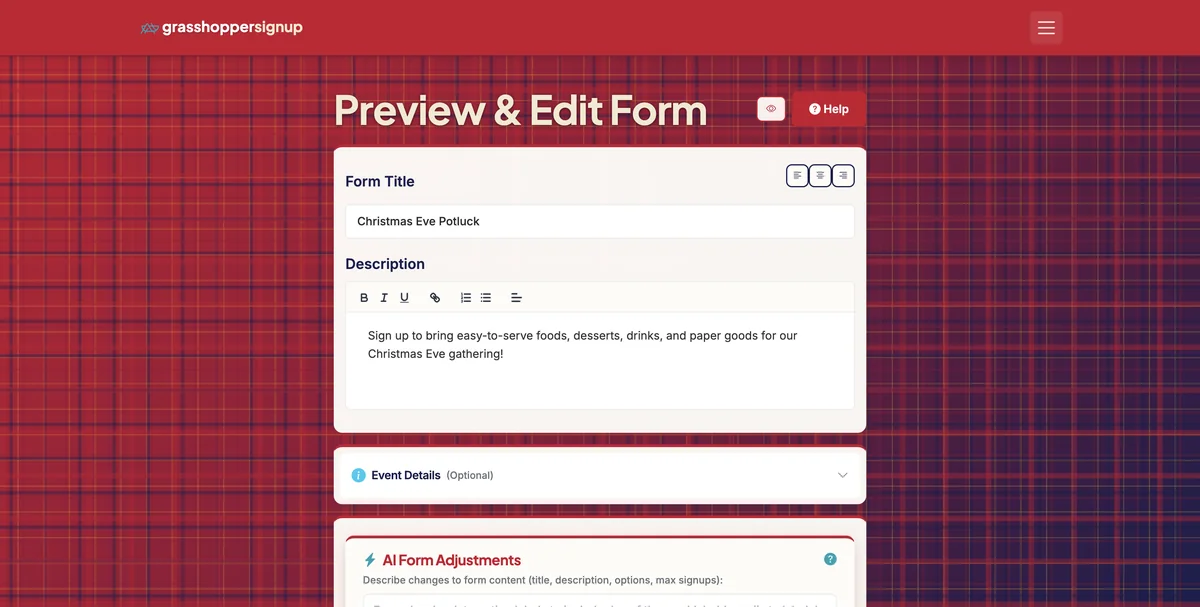
Start on the Edit Page of your form.
Step 2
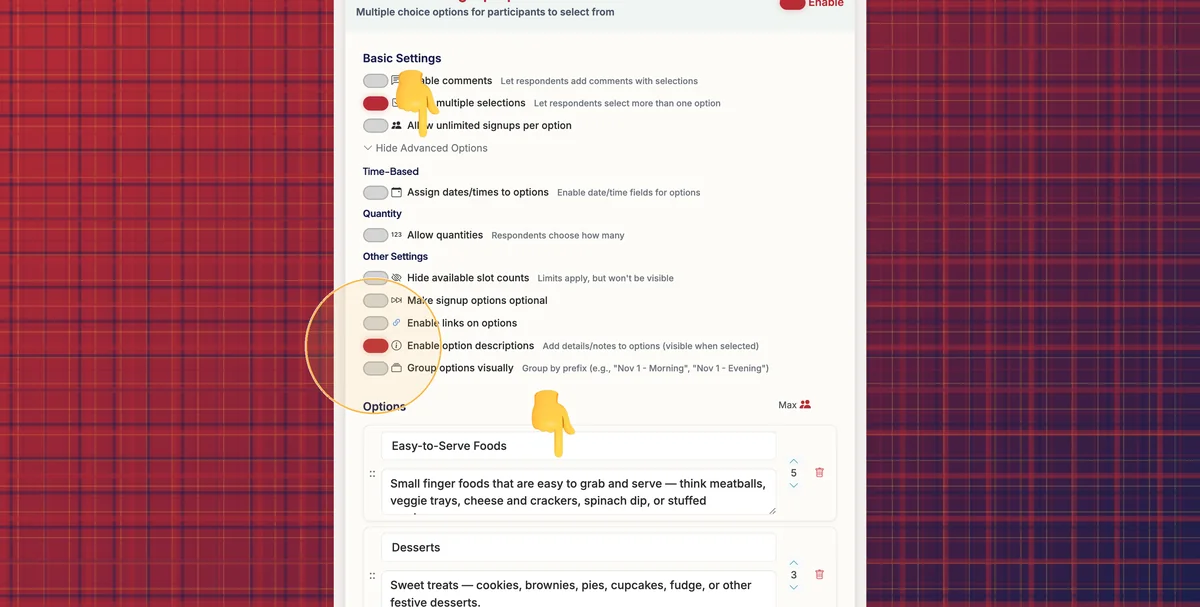
Expand the Advanced Options and click to 'Enable option descriptions'. This will create option description fields for each option.
Step 3
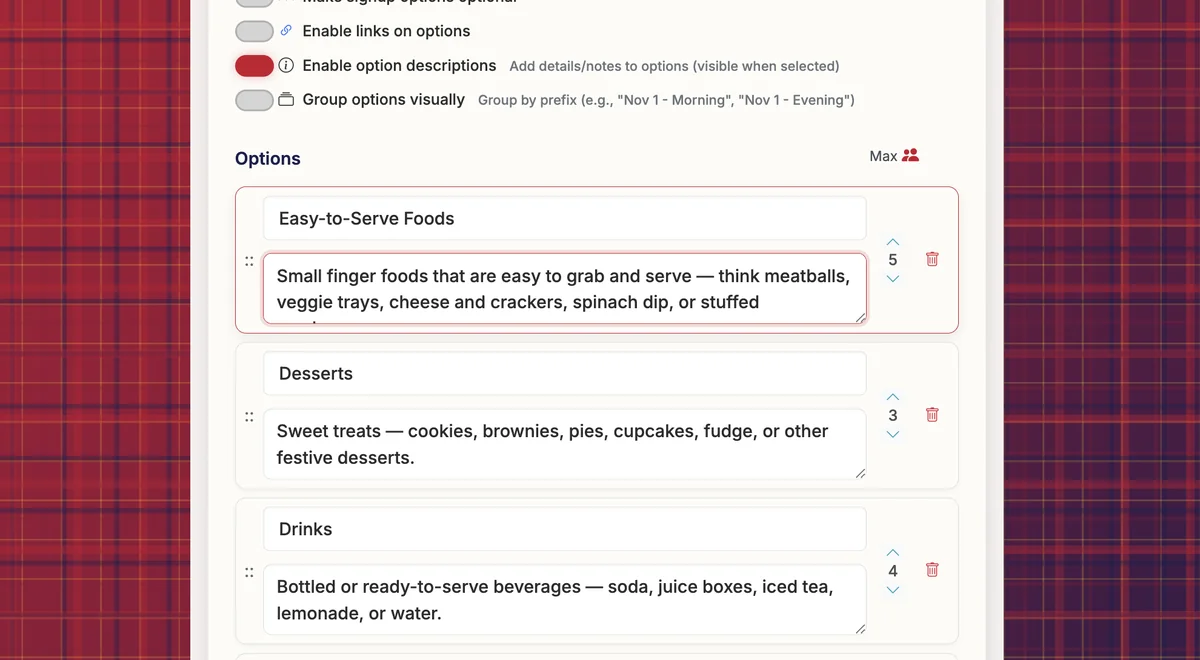
Add option descriptions for options where you want to provide additional information. These will display on the form when users select the option.
Step 4
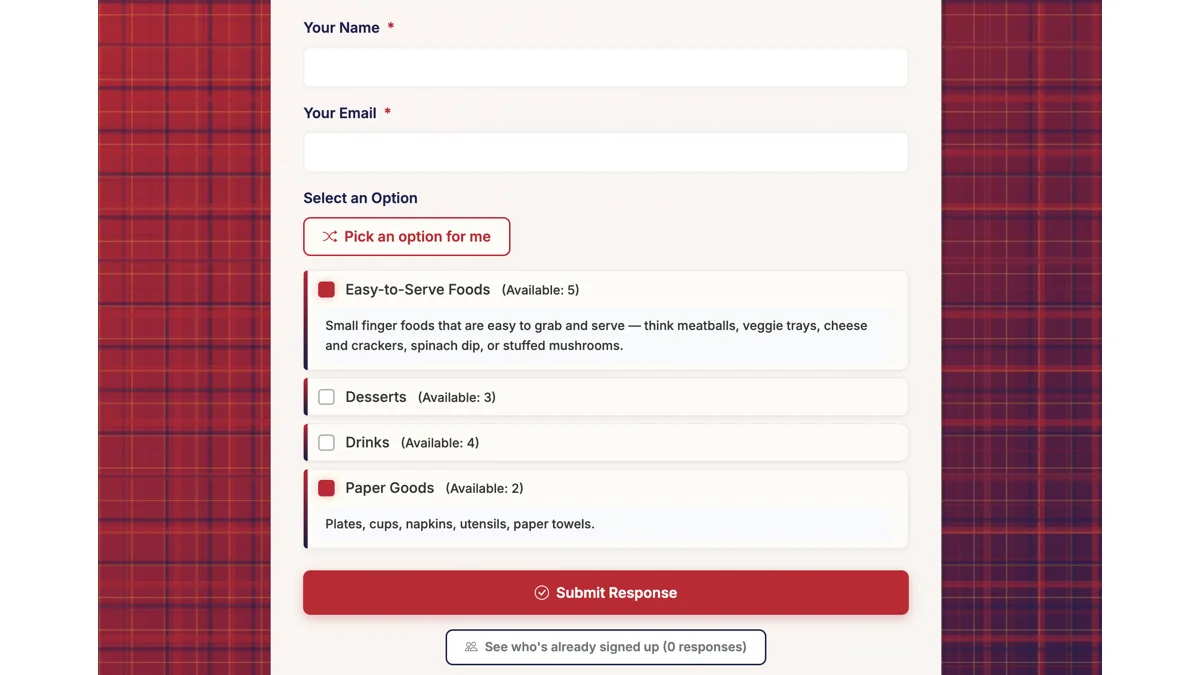
When respondents view your form, they will see option descriptions when they select an option that includes a description. Option descriptions will also be included on their form Submission page, in the email confirmations, and in reminder emails.
Step 5
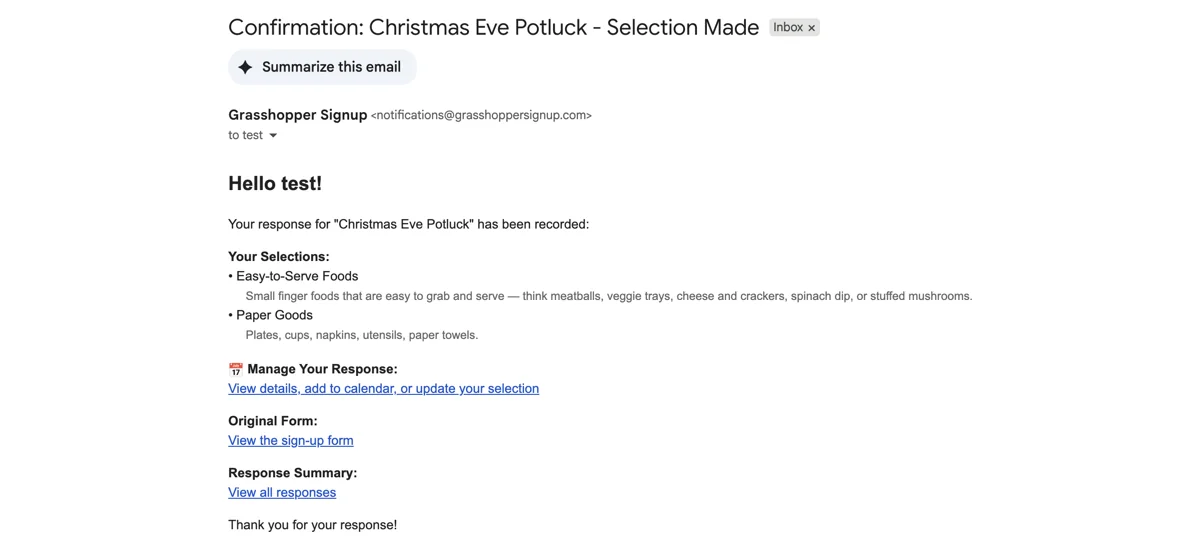
Email confirmations include option descriptions with each option selected for reference. Reminder emails sent before the event include them too, under each option, so details like what to bring or where to meet arrive right when people need them.
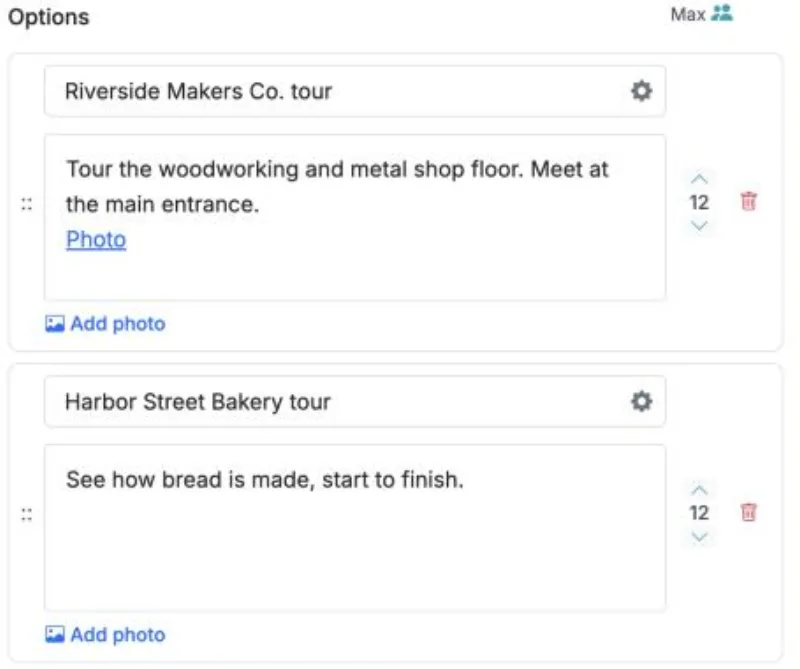
Add a Photo to an Option Description
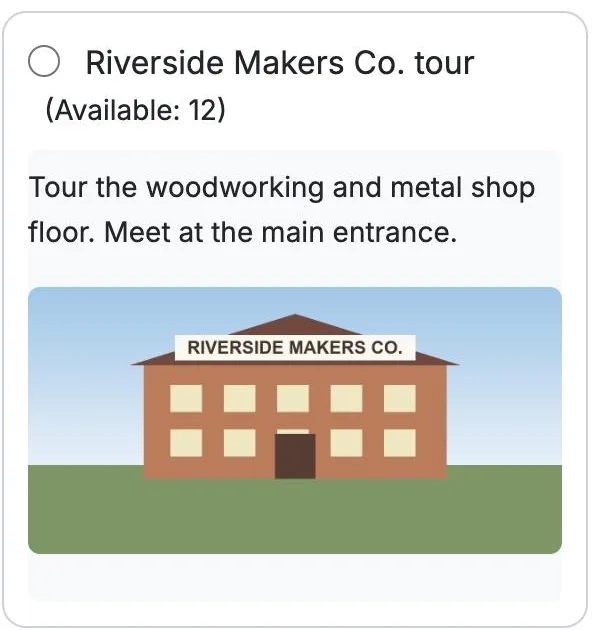
You can show a photo inside any option's description, such as the building for a worksite tour, the room for a session, or the item people are signing up to bring.
- Open your form from your Dashboard with the Edit button on its card, and make sure Enable option descriptions is turned on.
- Under the option's description box, click Add photo and choose an image from your computer or phone.
- A Photo link appears in the description. That's your photo. Save the form.
On your sign-up page, the link shows as the photo itself, sized to fit any screen, including phones:
Good to know:
- Descriptions open when someone taps the option. To show descriptions (and photos) right away, turn on Always Show Option Descriptions in the Respondent Experience section of the Form Settings card on your form's Options page.
- Large photos are resized automatically so your form stays fast.
- In confirmation emails, reminders, exports and the spreadsheet view, the photo appears as a link instead of the picture.
- To remove a photo, delete the Photo link from the description.
Step 6
You can view a link to a form that includes option descriptions here: https://grasshoppersignup.com/respond/8b6baa20-eea9-404f-94d6-1bba39dc1d94
Benefits of using option descriptions:
- Provide context: Give respondents more information about each option before they commit
- Reduce confusion: Clarify details like what to bring, where to meet, or what's expected
- Include in confirmations and reminders: Descriptions appear in email confirmations and reminder emails as a helpful reminder
- Flexible detail: Add descriptions only to options that need extra explanation
Total Steps: 6
Steps generated by StepHopper, a product of Grasshopper Signup - Create interactive step-by-step guides